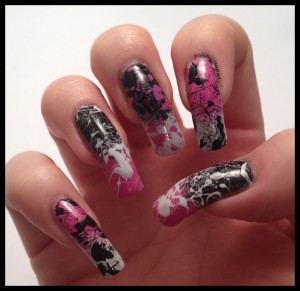
A bit of a change to all the pastel coloured nails I’ve been posting lately, this is the first time I’ve done splatter nail art, it is pretty fun and easy to do (although quite messy!)
Before you begin you will need a few different colours, a make up sponge, a few straws and lots of newspaper to cover your work area!
The polishes I used were:
Essie – Madison Ave-Hue
OPI – My Boyfriend Scales Walls
Ulta3 – Black Satin
As always I used a basecoat underneath and Seche Vite to finish.
Cover more space than you think you need with newspaper as this can get messy. If you want to avoid a lengthy clean up then I advise that you tape your nails before you start on the gradient and leave the tape there for the splatter as well.
I painted my nails with the lightest colour of the gradient and then used a make up sponge to apply the darker colour on top until I got the effect I wanted.
Once the gradient was dry I took straw and dipped it into the polish bottle (try not to take too much polish off as you remove it from the bottle, you want the middle of the straw to have a reasonable amount of polish in) then all you do then is point it at your nail and blow sharply into the straw, for some nails I repeated this a couple of times and I found that some polishes didn’t work as well due to their consistency so it’s a good idea to test it on a piece of paper first.
Finish with a top coat and you’re done. It’s a really simple effect and easy to do on both hands but you will probably need some acetone and a nail art brush to clean up your cuticles after.

